Effective drought-proofing for growers is not about generic advice; it’s a calculated soil engineering problem solved by diagnosing specific limitations and applying the right mechanical or biological tool.
- Building soil organic matter is key, but requires balancing carbon (straw) with nitrogen to create stable humus, not just temporary bulk.
- Strategic use of mulch, tillage implements, and ‘bio-drilling’ cover crops can fundamentally re-engineer soil porosity for better water capture and storage.
Recommendation: Start by performing a simple, field-based soil health audit to identify your primary limitation—be it compaction, low biological activity, or poor structure—to focus your efforts effectively.
For any vegetable grower in the East of England, the conversation around water is changing. It’s no longer about when the next irrigation cycle is, but whether there will be enough water allocation to have one. With increasingly dry springs and summer irrigation restrictions becoming the norm on sandy, free-draining soils, the focus must shift from reactive watering to proactive soil resilience. The common advice is to “add organic matter” or “use cover crops,” but these platitudes often lack the operational detail needed to make a real difference in a commercial setting.
The truth is, your soil isn’t just a medium; it’s a potential reservoir. But building that reservoir’s capacity isn’t a matter of simply dumping on more compost. It’s an engineering challenge at the microscopic level. What if the key wasn’t just adding more water, but fundamentally re-engineering your soil’s ability to capture, store, and deliver every single drop of rainfall or irrigation? This requires a shift in mindset: from a farmer to a soil systems engineer, understanding the interplay between organic inputs, tillage choices, and biological machinery.
This guide moves beyond the generic to provide a technical, efficiency-minded framework. We will dissect the mechanisms behind soil water storage, from the role of humus to the impact of different cultivation tools. We will explore how to turn plant roots into powerful subsoilers and how to diagnose and treat soil that actively repels water. This is your blueprint for building a more drought-proof foundation for your business, one hectare at a time.
Contents: Engineering Your Soil for Water Resilience
- Why Increasing Organic Matter by 1% Holds 20,000 Extra Litres Per Hectare?
- How to Apply Straw Mulch to Reduce Evaporation by 50% in Potatoes?
- Power Harrow vs Tine: Which Leaves Better Pores for Water Storage?
- The Dry Patch Risk on Sandy Soils and How to Use Wetting Agents
- When to Irrigate: Using Soil Moisture Probes to Stop Wasting Water
- Why Straw Incorporation Alone Won’t Build Stable Humus Rapidly?
- How to Break Plough Pans Using Roots Instead of Subsoilers on Heavy Clay?
- How to Assess Soil Health After a Wet UK Winter Without Expensive Lab Tests?
Why Increasing Organic Matter by 1% Holds 20,000 Extra Litres Per Hectare?
The starting point for any discussion on soil water holding capacity (WHC) is organic matter, but the figures are what truly command attention. A mere 1% increase in soil organic matter (SOM) can feel like an abstract goal, yet it translates into a tangible and massive increase in your soil’s reservoir capacity. The science is rooted in the physical structure of humus, the stable, long-chain carbon component of SOM. Humus acts like a microscopic sponge, with a vast surface area and charge that attracts and holds onto water molecules, preventing them from draining away or evaporating.
Quantitatively, this effect is profound. Data from the USDA Natural Resources Conservation Service indicates that a 1% gain in SOM enables the soil to hold an additional 20,000 gallons of water per acre. For a grower in the UK, that’s equivalent to approximately 187,000 litres per hectare. This isn’t just water sitting in the soil; it’s plant-available water that can sustain a crop through a dry spell, reducing irrigation demand and mitigating stress. Achieving this is a long-term project, as demonstrated by pioneers like Gabe Brown in North Dakota, who transformed his farm’s resilience by increasing SOM from under 2% to over 5% through a combination of reduced tillage, diverse cover cropping, and livestock integration. This wasn’t a quick fix, but a systematic re-engineering of the soil’s fundamental properties.
This water isn’t just held; it’s managed. Healthy soil with high SOM has improved structure, with stable aggregates creating a network of pores. This allows heavy rainfall to infiltrate quickly rather than running off, and it allows roots to explore a greater soil volume, accessing the stored water more efficiently. Increasing SOM is the most powerful lever you can pull to shift your soil from a leaky bucket to a strategic water asset.
How to Apply Straw Mulch to Reduce Evaporation by 50% in Potatoes?
Once water is in the soil, the next battle is keeping it there. Evaporation from the soil surface is a significant and often underestimated source of water loss, particularly in early crop stages before a full canopy develops. For a crop like potatoes, grown in ridges that expose a large surface area to sun and wind, this loss can be substantial. Applying a layer of straw mulch is a highly effective physical barrier to combat this, acting as an insulating blanket that reduces soil temperature and shields it from drying winds.
The effectiveness of this technique is well-documented. While local conditions vary, the principle is universal; for instance, a field study in Indian Punjab found that straw mulch resulted in 44.2 mm lower soil evaporation and a corresponding 19.0% higher potato tuber yield. The key to replicating this success in the East of England is not just applying straw, but applying it with precision. The timing, rate, and depth are critical for success and to avoid potential downsides, such as cooling the soil too much in spring and delaying emergence.
Applying a thick layer of straw post-hilling creates a physical barrier, significantly reducing water loss. This visual shows the ideal coverage over the potato bed.
The primary benefit is water conservation, but mulch also offers secondary advantages. It can significantly suppress annual weed growth, reducing herbicide costs, and prevent tuber greening by blocking light exposure, which maintains crop quality. For sandy soils prone to capping, mulch also protects the surface from the impact of heavy rain, maintaining infiltration pathways. It’s a low-tech, high-impact tool for managing the water balance sheet.
Your Action Plan: Applying Straw Mulch to Potatoes
- Timing is everything: Apply straw mulch only after the final hilling operation. Applying it too early can cool the soil, slowing emergence and early growth, which is a key consideration in a UK spring.
- Get the rate right: Aim for an application rate of 3.5 to 6.25 tonnes per hectare. Exceeding this (e.g., 10+ t/ha) can be counterproductive in cooler climates by overly depressing soil temperature and potentially reducing yield.
- Ensure full coverage: Maintain a consistent mulch depth of 8-15 cm. This is crucial not only for evaporation control but also to prevent light from reaching the developing tubers, which causes greening and solanine accumulation.
- Manage water penetration: If using overhead irrigation, be aware that a thick, dry straw layer can intercept a significant portion of light rainfall. Consider pre-wetting the mulch or using drip irrigation underneath the mulch to ensure water reaches the root zone.
- Monitor soil temperature: In the early part of the season, use a soil thermometer. If soil temperatures are hovering below the optimal for potato growth (around 15-20°C), delay the mulch application until the soil has warmed sufficiently.
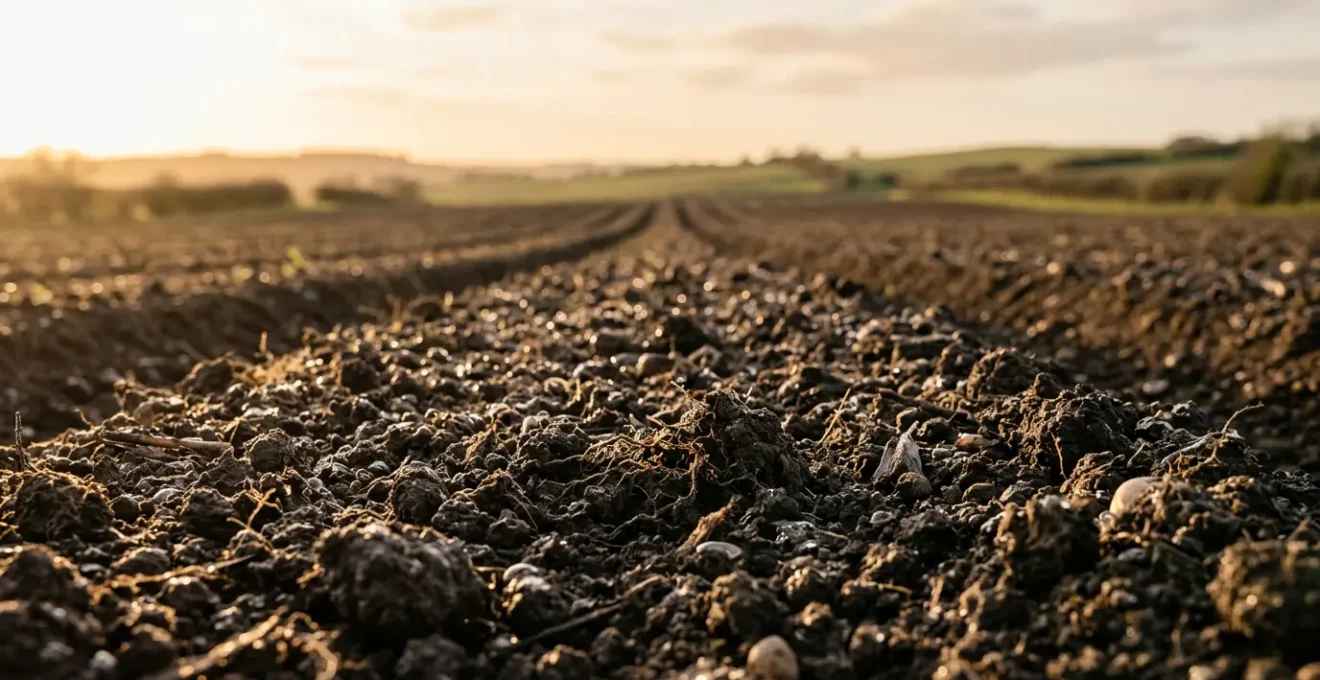
Power Harrow vs Tine: Which Leaves Better Pores for Water Storage?
Tillage is often seen as a necessary evil, but viewing it through the lens of “pore-level engineering” transforms it into a strategic choice. The implement you use to prepare a seedbed does more than just create a tilth; it fundamentally alters the soil’s pore structure, which dictates how water moves and is stored. The choice between a tine cultivator and a power harrow is a perfect example of this principle, as they have almost opposite effects on the soil’s architecture.
A tine cultivator, especially a deep-legged one, works by creating vertical fractures. It lifts and shatters the soil profile, breaking up compaction pans without inverting the soil layers. This process creates large, continuous vertical macropores. These are the superhighways for water infiltration, allowing heavy rainfall to move rapidly down into the soil profile instead of ponding or running off. They are also crucial for deep root penetration. While tines are excellent for improving drainage and long-term structure, they can leave a cloddier seedbed.
Conversely, a power harrow uses vertically rotating tines to create a horizontal stirring action. This produces a very fine, uniform seedbed of micropores, which is excellent for seed-to-soil contact and initial germination. These small pores can hold a good amount of water initially through capillary action. However, this finely-milled structure is inherently less stable. After heavy rain, these micropores can collapse, leading to surface sealing (capping) and a reduction in infiltration over time. There’s also a risk of creating a new, shallow compaction layer or “smear pan” at the base of the working depth if used incorrectly.
The choice depends on the objective. For breaking compaction and improving long-term water infiltration on heavier soils, the tine cultivator is superior. For creating the perfect final seedbed on a loam soil that already has good structure, the power harrow is more efficient. The following table breaks down these differences in detail.
| Feature | Tine Cultivator | Power Harrow |
|---|---|---|
| Primary Action | Creates vertical fractures and deep macropores without soil inversion | Horizontal stirring with vertical rotating tines, creating fine tilth |
| Pore Structure Created | Large, stable vertical macropores ideal for water infiltration and root penetration | Fine, uniform micropores suitable for seedbed but prone to collapse after heavy rain |
| Best Soil Type | Heavy clay soils requiring decompaction and breaking plough pans | Loam soils for final seedbed preparation |
| Compaction Risk | Minimal surface compaction; breaks existing compaction layers | Risk of creating shallow ‘smear pan’ at incorrect RPM/speed ratios |
| Water Storage Impact | Superior long-term water storage through stable macropore networks enhanced by subsequent root growth | Good initial water holding in fine pores but less stable structure over time |
| Operational Requirement | Higher HP requirement per meter; slower speed | PTO-driven; requires significant tractor power but faster operation |
| Best Use Case | Breaking compaction; conservation tillage; improving drainage | Final seedbed preparation; incorporating amendments; creating uniform planting surface |
The Dry Patch Risk on Sandy Soils and How to Use Wetting Agents
For growers on the sandy soils of East Anglia, a frustrating and common phenomenon is the “dry patch”—areas of the field where water seems to refuse to penetrate, even after irrigation or rainfall. This isn’t just soil being dry; it’s a specific condition known as soil hydrophobia or water repellency. It occurs when sand particles become coated with waxy organic compounds, typically from the decomposition of certain plant residues or microbial activity. This waxy coating prevents water from adhering to the soil particles, causing droplets to bead up on the surface and either evaporate or run off into more receptive areas.
This problem is invisible until it’s too late, leading to patchy crop emergence, localised drought stress, and inefficient use of expensive water. Before you can treat it, you must diagnose it. You don’t need a lab; a simple field test can reveal the extent of the problem. Once identified, the targeted solution is the application of wetting agents, also known as soil surfactants. These are essentially detergents for your soil. They work by reducing the surface tension of water, allowing it to break through the waxy coating and make contact with the soil particles. They don’t create water, but they ensure the water you apply actually gets into the soil profile where the roots are.
This macro image clearly shows a water droplet beading on the surface of hydrophobic sandy soil, failing to infiltrate and moisturize the root zone.
Using wetting agents is not a blanket solution but a prescriptive treatment. Applying them across an entire field is costly and unnecessary. The key is to map the hydrophobic zones and apply the product only where needed, often through the irrigation system (fertigation) or as a targeted spray. It’s a classic example of using a precise chemical tool to solve a specific physical problem, turning unproductive, water-shedding patches back into a valuable part of your field.
Checklist: Diagnosing Soil Hydrophobia with the Water Drop Penetration Test (WDPT)
- Collect dry samples: Identify areas where you suspect dry patch issues. Collect soil samples from the top 5-10 cm. It is critical that the soil is air-dry for the test to be accurate.
- Prepare the test: Place a small amount of the dry soil on a clean, flat surface or in a shallow dish.
- Apply the water drop: Using a standard eyedropper or pipette, carefully place a single drop of clean water (distilled is ideal, but tap water will work) onto the soil surface.
- Time the infiltration: Start a stopwatch immediately. Time how long it takes for the water droplet to be completely absorbed by the soil, losing its surface sheen.
- Interpret your results:
- Less than 5 seconds: Non-hydrophobic. Your soil is fine.
- 5 to 60 seconds: Slightly hydrophobic. A minor issue, monitor.
- 60 to 600 seconds (1 to 10 minutes): Strongly hydrophobic. This is causing yield loss and requires treatment with wetting agents.
- More than 600 seconds: Severely hydrophobic. A significant problem requiring immediate and likely repeated treatment.
When to Irrigate: Using Soil Moisture Probes to Stop Wasting Water
The most expensive water is wasted water. Irrigating by the calendar (“it’s Tuesday, we irrigate”) or by sight (“the crop looks a bit stressed”) is an outdated and inefficient approach. The only way to apply water with precision is to know exactly how much is already in the soil profile. This is where soil moisture probes become an essential tool for the efficiency-minded grower. These devices provide real-time, objective data on the water content at different depths in the root zone, transforming irrigation from guesswork into a data-driven decision.
By using probes, you can track how water is being used by the crop daily and see the precise impact of an irrigation event or a rain shower. The goal is to manage soil moisture between two key thresholds: Field Capacity (FC), the maximum amount of water the soil can hold against gravity, and the Management Allowable Depletion (MAD), a trigger point you set (e.g., 50% of available water) before the crop begins to experience stress. Irrigating before this trigger point is a waste of water, energy, and labour. Waiting too long causes yield-limiting stress.
Probes allow you to irrigate with just enough water to replenish the root zone back to field capacity, without over-applying and causing leaching of valuable nutrients (and money) below the roots. This is particularly crucial on the sandy soils of East Anglia, where over-irrigation quickly leads to nutrient loss. The data from probes also reveals deeper issues, such as a plough pan that is preventing water from infiltrating, or roots that are not developing as deep as they should be. It’s a diagnostic tool as much as a scheduling one. Adopting this technology is a direct investment in reducing input costs and maximizing the impact of every cubic metre of water.
Your Roadmap: Strategic Placement of Soil Moisture Sensors
- Map your zones: Don’t just place a sensor randomly. Divide your field into at least two or three representative zones. Choose a ‘typical’ area, a known chronically dry spot (e.g., a sandy knoll), and if applicable, a chronically wet spot (a low-lying area). This gives you a complete picture of field variability.
- Go deep: A single sensor at one depth is not enough. To manage the entire root zone, install sensors at multiple depths. For most vegetable crops, a common setup is at 15 cm, 30 cm, and 45 cm (or 6, 12, and 18 inches) to monitor water uptake throughout the rooting profile.
- Find the ‘real’ location: Avoid placing sensors in anomalous spots like directly under an irrigator, near a headland, in a wheel track, or at the edge of the field. The sensor must be representative of the conditions experienced by the majority of the plants in that zone.
- Ensure perfect contact: Air gaps are the enemy of accurate readings. When installing, ensure there is gap-free soil contact around the entire sensor. For probe-style sensors, use an installation tool to create a pilot hole that is slightly smaller than the probe itself. For individual sensors, backfill the hole carefully, tamping down the soil in layers to eliminate air pockets.
- Calibrate your Field Capacity: After a heavy irrigation event or significant rainfall (at least 25mm), wait 12-24 hours for the free-draining water to move through. The volumetric water content reading at this point is your on-site Field Capacity. This is the most important number for your irrigation scheduling—it’s your ‘full’ tank.
Why Straw Incorporation Alone Won’t Build Stable Humus Rapidly?
The mantra “add organic matter” often leads growers to incorporate chopped straw or other crop residues after harvest, which seems like a logical step. However, many are then disappointed when soil health doesn’t improve as quickly as expected, and the following crop may even show signs of nitrogen deficiency. The reason lies in a fundamental biochemical principle: the carbon-to-nitrogen (C:N) ratio. Soil microbes, the engines of decomposition, need a balanced diet. Straw is extremely high in carbon but very low in nitrogen.
Typical wheat straw has a C:N ratio of approximately 80:1. The microbes that break down this carbon require nitrogen to build their own bodies, and they prefer a diet with a C:N ratio of around 24:1. When faced with a mountain of high-carbon straw, the microbial population explodes, consuming all the readily available nitrogen in the soil to fuel their activity. This process, known as nitrogen immobilisation or ‘N-robbing’, effectively locks up soil nitrogen, making it unavailable to the growing cash crop. The result is a temporary but damaging nitrogen deficit that can stunt growth and reduce yield.
Simply incorporating straw adds bulk, but it doesn’t efficiently build stable humus. To do that, you must manage the C:N ratio at the time of incorporation. This means providing a nitrogen source alongside the carbon-rich straw. This can be achieved by co-incorporating a nitrogen-rich material like a legume cover crop (e.g., vetch), applying composted manure, or using a small amount of synthetic nitrogen. By providing this balanced diet, you fuel the microbial process efficiently, accelerating the formation of stable humus and avoiding the N-robbing effect. It’s the difference between just adding ingredients and following a recipe for “strategic incorporation”.
Your Action Plan: The ‘Green and Brown’ Cocktail for Rapid Humification
- Calculate your C:N load: For a typical straw incorporation of 5 tonnes/hectare, you are adding a huge carbon load. Recognise that this creates a significant nitrogen demand from your soil’s microbial workforce.
- Balance the diet: To achieve an optimal C:N ratio for decomposition (around 24:1 to 30:1), you must add a high-nitrogen ‘green’ source. Your options include incorporating a terminated legume cover crop, adding well-composted manure (2-4 t/ha), or, if necessary, a tactical application of supplemental nitrogen (e.g., 40-60 kg N/ha).
- Strategic timing: Don’t incorporate everything at once. If possible, incorporate the ‘green’ nitrogen source a week or two before the ‘brown’ carbon source (straw). This gives the microbes a head start in releasing available N.
- Add water (if needed): Microbial activity requires moisture. During dry autumns, the decomposition process will stall. Ensure soil moisture is adequate (60-70% of field capacity) during the first 4-6 weeks after incorporation to keep the humification process active.
- Monitor the next crop: Even with good management, keep an eye on the following cash crop for signs of nitrogen deficiency (e.g., pale green or yellowing lower leaves). A small, early top-dressing may be required as the decomposition process completes.
How to Break Plough Pans Using Roots Instead of Subsoilers on Heavy Clay?
On heavier soils, or even sandy soils with a history of trafficking, plough pans are a pervasive problem. These dense, compacted layers, typically found just below normal cultivation depth, act like a concrete floor, blocking water infiltration and root growth. The conventional solution is mechanical: a subsoiler, which requires huge tractor power, high fuel consumption, and only provides a temporary fix for 2-3 years. A more sustainable and elegant solution is to deploy “biological machinery”—using the power of plant roots to do the work of steel.
This technique, known as “bio-drilling”, involves planting specific cover crops with aggressive root systems that are genetically programmed to punch through compacted layers. Unlike a subsoiler which creates a simple fracture, these roots create a network of stable, organic-matter-lined macropores. When the cover crop is terminated, the roots decompose, leaving behind these valuable channels. A recent review on compaction-busting cover crops highlights that these biopores remain stable for 12-18 months or more, acting as preferential pathways for water and the roots of the following cash crop.
The choice of cover crop is critical and depends on the specific compaction issue. For breaking a deep, dense hardpan, species with powerful taproots like Daikon radish or sweet clover are ideal. Daikon radish, for instance, can produce a taproot that penetrates 60-90 cm. For improving structure in the topsoil (0-30 cm), a species with a dense, fibrous root mass like sorghum-sudangrass is more effective. This is not a passive process; it is the active deployment of a specific biological tool for a targeted engineering task, creating permanent improvements to soil structure rather than a temporary mechanical fix.
This table details some of the top cover crop choices for this task.
| Cover Crop Species | Root Architecture | Penetration Depth | Best Soil Type | Planting Window | Termination Method |
|---|---|---|---|---|---|
| Daikon Radish (Raphanus sativus var. longipinnatus) |
Deep taproot (5-8 cm diameter) | 60-90 cm | Clay and clay-loam with shallow compaction (15-40 cm) | Late summer (August-September in temperate zones) | Winter kill (frost-sensitive); mow before seed set |
| Sweet Clover (Melilotus officinalis) |
Fibrous taproot | 100-150 cm | Heavy clay with deep hardpan; tolerates alkaline soils | Spring or early fall | Mow/roll at flowering; terminates after 2 years |
| Alfalfa (Medicago sativa) |
Extensive fibrous taproot | 120-180 cm | All clay types; requires well-drained surface initially | Spring or late summer | Multiple mowing or herbicide termination |
| Sorghum-Sudangrass (Sorghum bicolor × S. bicolor var. sudanense) |
Dense, fibrous mass | 60-100 cm | Compacted topsoil and subsoil (0-50 cm); warm-season | Late spring (after soil warms to 15°C+) | Mow/crimp before seed head formation; frost kill |
| Chicory (Cichorium intybus) |
Deep taproot | 90-120 cm | Clay-loam; tolerates compaction and drought | Spring or fall | Mow multiple times; can persist 2-3 years |
Key Takeaways
- Increasing soil organic matter by just 1% can add nearly 200,000 litres of water holding capacity per hectare.
- Strategic use of mulch, cover crops, and tillage directly engineers soil porosity, which is the foundation of water retention.
- Diagnosing specific soil issues like hydrophobia or compaction allows for targeted, cost-effective treatments rather than generic, field-wide applications.
How to Assess Soil Health After a Wet UK Winter Without Expensive Lab Tests?
After a long, wet UK winter, assessing the state of your soil is the first and most critical step in planning for the season ahead. But you don’t need to wait weeks for expensive lab results to get a clear picture of your soil’s health. By using your senses and a few simple tools, you can perform a powerful field-based audit that tells you about your soil’s structure, biological activity, and drainage. This hands-on assessment gives you immediate feedback to guide your management decisions.
The condition of your soil post-winter is a direct indicator of its resilience. Has it held its structure, or has it slumped and compacted? Is it teeming with life, or is it a sterile environment? The presence and diversity of earthworms, for example, is one of the best indicators of a healthy soil ecosystem. A spadeful of soil that is rich in earthworms is a sign of good aeration, water infiltration, and nutrient cycling. Conversely, an absence of worms, or the presence of weeds that thrive in compacted, waterlogged conditions (like rushes or creeping buttercup), are clear red flags.
This process of “reading your soil” is about building a deeper connection and understanding. The smell of the soil, the feel of it in your hands, and the way it responds to water all provide valuable clues. This direct assessment allows you to pinpoint problem areas and monitor the success of your management strategies over time. It’s the essential starting point for any targeted soil improvement plan.
Getting your hands dirty is the best way to assess your soil’s biological health. A healthy population of earthworms is a key sign of a thriving soil ecosystem.
By combining these simple tests, you can build a comprehensive ‘report card’ for your soil’s health without ever leaving the farm gate, enabling you to make smarter, more timely decisions for the coming season.
Your Field-Based Soil Health Assessment Toolkit
- Test 1 – Slake Test for Aggregate Stability: Take a small, dry, pea-sized clod of soil and place it in a clear jar of water. A healthy, well-structured soil aggregate will hold its shape. A soil with poor structure will quickly disintegrate, slumping into a cloud of mud. This indicates a high risk of erosion and surface capping.
- Test 2 – Spade Square Earthworm Audit: In a representative area, dig out a 20x20x20 cm cube of soil and place it on a tarp. Sort through it and count the earthworms. More than 10 worms is excellent; 5-10 is adequate; fewer than 5 indicates poor biological activity. Note the different types: deep-burrowing (large, dark heads), topsoil-dwelling, and surface-litter dwellers.
- Test 3 – Indicator Weed Reading: Weeds are messengers. Look for patterns. A prevalence of Creeping Buttercup or Rushes points to poor drainage and shallow compaction. Docks often indicate deeper compaction combined with high fertility. Thistles can signal deep compaction that has been disturbed.
- Test 4 – Sensory Evaluation (Smell and See): Dig a small pit. A healthy, aerobic soil has a rich, earthy smell (geosmin). If it smells sour, metallic, or like rotten eggs, it’s a sign of anaerobic (waterlogged) conditions. Look at the soil profile: a uniform dark brown colour is good. Grey mottling or solid blue-grey layers indicate prolonged lack of oxygen.
- Test 5 – Physical Structure Feel Test: Take a handful of moist (not wet) soil. Squeeze it in your fist. A healthy soil will form a ball that can be easily crumbled. If it forms a hard, dense ball or feels slick and plastic-like, it indicates poor structure and clay dispersion.
By systematically diagnosing your soil’s specific limitations and deploying these targeted engineering strategies, you can progressively build a more resilient and water-efficient foundation for your crops. Evaluate your soil’s current state now to create a targeted action plan for the seasons ahead.